

Deploying A Rails 6.x App To Heroku


This guide has been written primarily with the beginner in mind. It can also serve as a reference manual for those with more experience.
It is divided into 5 main sections:
- Introduction
- Prerequisites
- Deployment
- Troubleshooting
- Conclusion
The Introduction gives a brief outline of what to expect. The Prerequisites section lists the tools and materials needed, while also making some assumptions on preexisting knowledge. The Deployment section is the main part of this guide, as it lists the step by step process to follow in order to successfully push our Rails application to Heroku and have it hosted online. While the Troubleshooting section handles common errors and issues that may arise. The Conclusion is a brief summary of everything discussed.
Introduction
So you’ve discovered the magic of Rails - An open source, web server application framework based on the Ruby language, also known as Ruby on Rails, RoR, or simply Rails - and you have built some applications with it.
The next step is to showcase your work, make it available to a larger audience than your localhost. This means deploying your app from your computer and making it available online.
There are several options to do this: AWS, Azure, Google Cloud, Heroku and many others. While they all have their pros and cons, we will not be going into a discussion of which is best. That is beyond the scope of this guide, as it is an area that is likely to be highly opinionated. Heroku gets the job done, and the documentation is intuitive and easy to follow.
Now, we will move on to the next section:
Prerequisites
This guide will be making several assumptions:
- You already know how to build a rails app (Here’s a link to the official Rails guide)
- You are familiar with Git, and have it installed on your local machine. You can download, install, or update Git by following the instructions from the official site.
- You have installed a version of Ruby that is at least 2.5. (You can check by running the command
$ ruby --versionin your Terminal. An output similar to this:ruby 2.6.6p146 (2020-03-31 revision 67876) [x64 -mingw32]means you do.
- You have a Heroku user account. Here's a link to the website to create one if you don't.
Now, we move on the fun part:
Deployment
Setup your local environment
First, we need to install the Heroku CLI. CLI is an abbreviation for command line interface, which is a text-based user interface, allowing a user to interact with files on a computer by means of a terminal such as Git. Next, run the command
$ heroku login
and follow the prompts. At this point, your terminal will look like this:
heroku: Enter your Heroku credential
Email: jaemon@example.com
Password:
Could not find an existing public key.
Would you like to generate one? [Y/n]  // Hitting on the ‘Y’ key means Yes, continue.
Generating new SSH public key.
Uploading ssh public key /Users/jonathan/.ssh/id_rsa.pub
After entering your email and password, the terminal prompts you to generate a public key. This is an encryption system that makes communication secure between your computer and the Heroku platform.
These series of steps allow your computer to be connected to the Heroku platform, much the same way you connect the Git terminal to your online repositories on Github.
After this has been done successfully, subsequent attempts at logging in via the terminal are much simpler. You will get a prompt in the terminal that states:
heroku: Press any key to open up the browser to login or q to exit:
Pressing any key (except ‘q’ of course) and hitting the ‘Enter’ key opens up this browser page:
So now, you are ready to create a new app, or upgrade an existing one.
Create a new app
(You can skip this section if you are upgrading an existing application)
First, ensure you have the latest version of rails by running the command:
$ rails -v// -v is shorthand for --version
Your output should look something like this:
Rails 6.1.3.1
The first number, 6 shows that you have - you guessed it - a version of rails 6. If you don’t, you can update to the latest version:
$ gem install rails --no-document
Then in the directory where you want to create the app, run the command
$ rails new myapp --database=postgresql
Ensure you replace ‘myapp’ with the name you want for your application. This part of the command ‘--database=postgresql’ ensures that your app is created with the postgresql database. This is the database used by Heroku. Whereas, Rails uses the SQLite database by default.
It is best practice to use the same database for both your development and production environments, as this reduces the emergence of bugs which may arise as a result of the difference in environments, hence the need to create your new application with the postgresql database.
The next step is to move into the newly created directory:
$ cd myapp
Next, create a database:
$ bin/rails db:create
Upgrade an existing app
To upgrade an existing app built with the default sqlite database, navigate to the Gemfile of your app, preferably in your code editor and change the line:
gem ‘sqlite3’
to:
gem ‘pg’
Also add
gem ‘puma’ // This configures your app to use Puma
Then run the command:
$ bundle install
to re-install your dependencies.
Next, navigate to the config/database.yml file to confirm it is using the pg adapter. The file should look something like this:
# PostgreSQL. Versions 9.3 and up are supported.
# Install the pg driver:
#   gem install pg
# On macOS with Homebrew:
#   gem install pg -- --with-pg-config=/usr/local/bin/pg_config
# On macOS with MacPorts:
#   gem install pg -- --with-pg-config=/opt/local/lib/postgresql84/bin/pg_config
# On Windows:
#   gem install pg
#       Choose the win32 build.
#       Install PostgreSQL and put its /bin directory on your path.
#
# Configure Using Gemfile
# gem 'pg'
#
default: &default
  adapter: postgresql
  encoding: unicode
...
( The 3 dots indicate that the file has been truncated for brevity)
Next, create a file in your root directory named Procfile. Then, copy paste this line into the file:
web: bundle exec puma -t 5:5 -p ${PORT:-3000} -e ${RACK_ENV:-development}
Have A Root Page
Whether you are upgrading an existing app or creating a new one, you need to have a root page. The root page is the first page users see when they navigate to your app online.
If your app is new you can create one by using the command:
$ rails generate controller Welcome index
This is a twofold command, which:
- Creates a controller named Welcome and
- Creates an html.erb page named index
You can now navigate to the index page and edit its contents as you wish by navigating to app/views/welcome/index.html.erb
Next step is important:
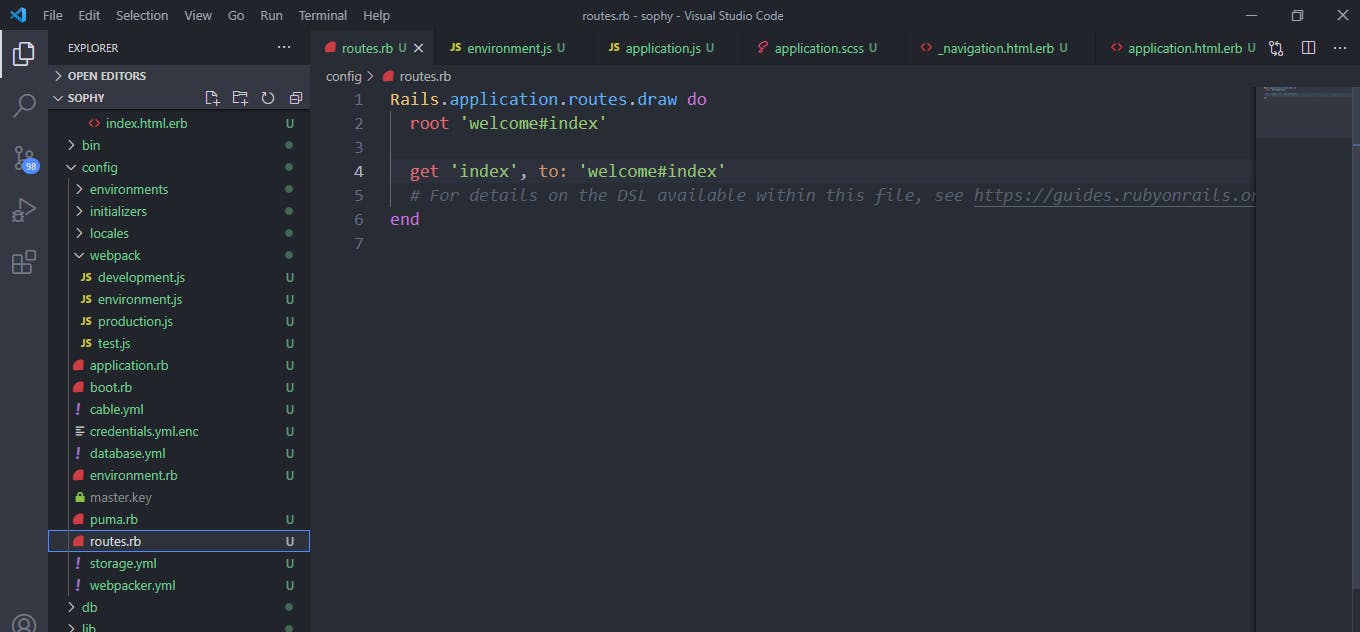
Go to config/routes.rb (This is the file responsible for the routes on your app and for generating URLs)
Go to the line just below ‘Rails.application.routes.draw do’
and add this line:
root 'welcome#index'
This identifies the index page as the landing page of your application.
See image below:
You can confirm that everything is working fine by running the command:
$ rails server
This opens up your app on localhost:3000, displaying your index page.
Initialize with Git
The next step is to initialize your project with Git. Navigate to your project directory and run the commands:
$ git init
$ git add . //note the period mark after ‘add’
$ git commit -m “First Commit”
$ git status // to verify your code was committed properly
At this point, you can also choose to push your code to Github ( not mandatory, but good practice). If you don’t already have a Github account, head over to the website here and create an account. Then click on New to create a new repository. Follow the guidelines and your code will be on Github in no time.
Then, continuing with Heroku:
$ heroku create
Creating app... done, funky-shrubs-42753
https://funky-shrubs-42753.herokuapp.com/ | https://git.heroku.com/funky-shrubs-42753.git
You can change the generated name by running:
$ heroku apps:rename newname
renaming funky-shrubs-42753 to newname… done
https://newname.herokuapp.com/  | git@herokuapp.com:newname.git
Git remote heroku update
Replace "newname" with the new name you are giving to your app.
Next, deploy your code:
$ git push heroku main
Then finally, migrate your database by running the command:
$ heroku run rails db:migrate
To see your app live you can either copy paste the url into your browser or
from the command line, run
$ heroku open
and voila! your application opens up in the browser.
Congratulations! You have successfully deployed your rails app, hurray!

Okay, back to work.
You can customize your domain name. Check out this link.
Troubleshooting
Sometimes, things don’t go as planned. Maybe your app crashes and refuses to run. Or, it doesn’t just work as expected. The first thing to check is your Gemfile and see if you are missing some gems from production that have been included in your development or test group. If that is the case, you can move them out of the group, so they will be universally accessible. For example look at the screenshot below:
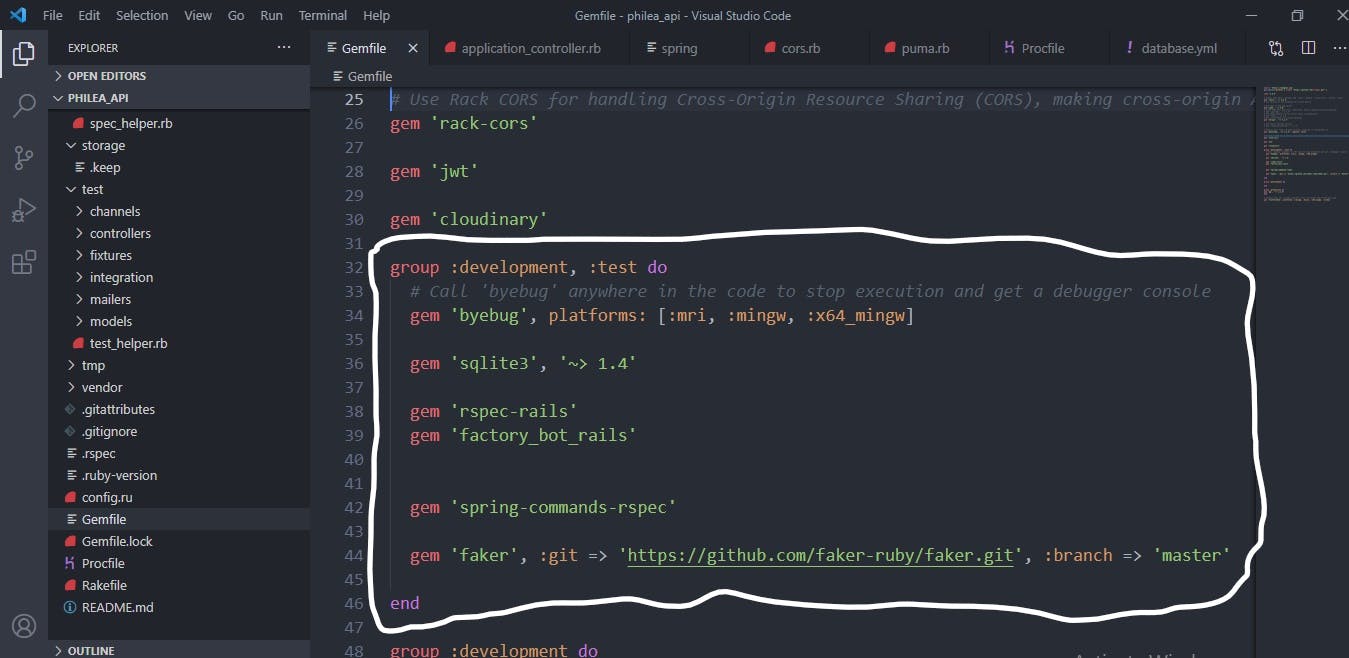 If any of the gems within the white box is needed for production then your app won’t run, as Heroku excludes gems in ‘development’ and ‘test’ groups. So, you would have to cut out the gem, and paste outside the box. Don’t forget to run
 $ bundle install afterwards.
Also, running the command $ heroku logs is useful for troubleshooting.
Then you can also consult the heroku documentation , and see if you missed out on something.
Finally, there’s Google. You can copy the error message and paste in your browser. Carefully going through the search results will most likely lead to a solution, as there’s virtually no issue without precedence. Else, you might just have a bug named after you!
Conclusion
So I hope that this write up will be helpful to you in deploying your rails 6 app to Heroku. You can hit me up in the comments section for your observations. See you soon!
Useful links:
(Celebratory gif courtesy Giphy )